Projects — DEC Module Storage Shelves Project — 2008 09 01
Having over 1,000 DEC Modules lying in various boxes, I decided it was time to create some kind of brilliant organizational structure for them. Having just moved into our new home with a huge, walkout basement, the opportunities were wide open.
The IKEA Factor
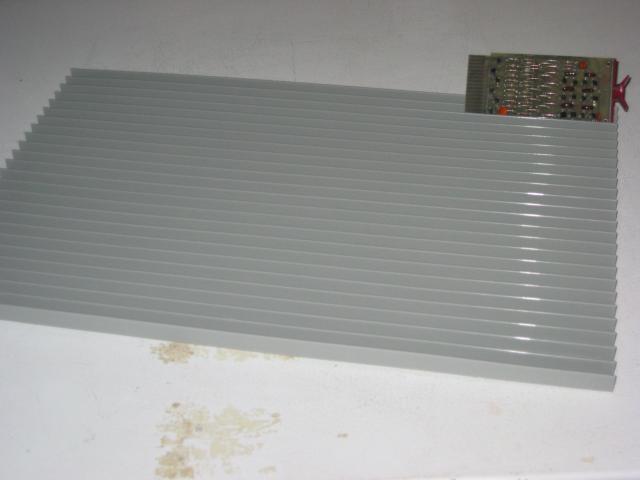
IKEA sells these plastic, ribbed sheets that are to be nominally used as "CD Holders". It's the "INREDA" product, and costs about CAD$8. One day when I was there, I looked at it and thought to myself, "Hmmmm... I wonder if that will fit a DEC Module?" So I bought one, and sure enough, it fit perfectly! (Note that there's also an INREDA DVD holder — the ribs are further apart than on the CD holder product; I don't recommend that one.) Each length of ribbing holds 24 CDs. (If Google can build their servers out of LEGO, surely I can build my storage racks out of IKEA?)
Ideal
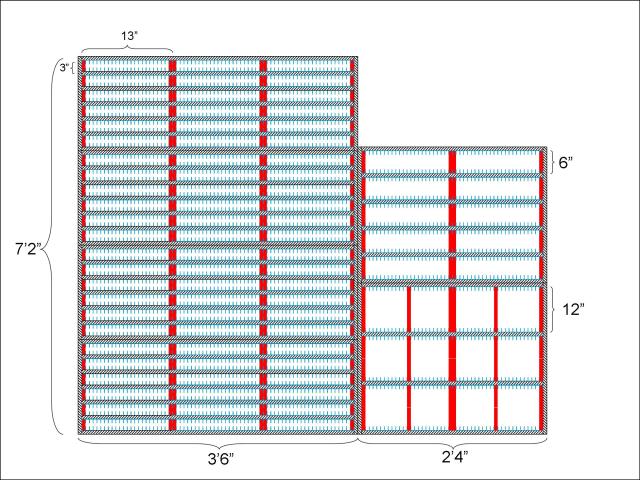
Doing a little PowerPoint, I designed this initial layout. In order to keep it somewhat modular, there are four single-high module shelving units (each being a 6x3 sub-unit). This way I can build something that I can carry and move around easily. The double-highs are 5x2 and the quads are 3x2. These quantities are based on the number of cards I have, with about 20% expansion capacity. The red shelves are wood supports, so this takes the available capacity down from 24 to 22 (I designed in extra shelf supports for the quad high cards in the middle just in case). Note that the dimensions given on the PowerPoint are approximate (I wanted to get an idea of how big this thing would be). Final dimensions will be posted once I complete the project.
Here's an approximate cost breakdown:
| Shelving Unit | INREDAs | Modules | #8 x 1" screws | Lumber (estim.) |
|---|---|---|---|---|
| Singles | 36 | 1584 | 336 | 1746" x 6" (73 sq ft) |
| Doubles | 5 | 220 | 50 | 336" x 6" (14 sq ft) |
| Quads | 6 | 126 | 86 | 392" x 12" (33 sq ft) |
| Totals | 47 | 1930 | 472 | 120 sq ft (4 sheets 8' x 4') |
| Costs | $376 | (priceless) | $20 | $80 |
The project total is $476, so I'm going to budget $600.
Cutting to Size

The IKEA INREDA is 4x the size of what I need (for single and double high modules; for quads it's only 2x the size, because quad modules are much deeper). So, I simply cut it into four pieces. This is a bit of a pain in the ass. I tried cutting it with an electric hand saw, but that left too many jagged edges that had to be filed down (and even then I wasn't completely happy with it.)
NOTE added 20090101 — it turns out that when you populate it with modules, you don't notice the jagged edges, so this approach is fine after all!
The best technique so far is to use a sharp knife on the back, and bend the plastic away from the cut edge. This then exposes the ribs, and if you bend the plastic more, the knife now easily slices through the ribs. This yields a slightly curvy surface unless you are really careful. You can hide the really bad curves on the back side.
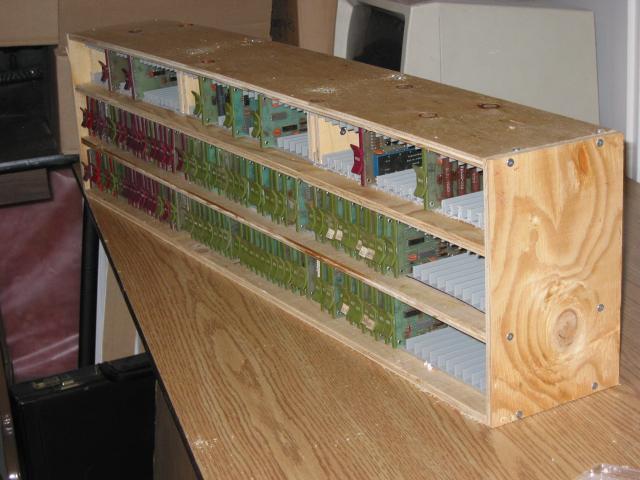
First Row
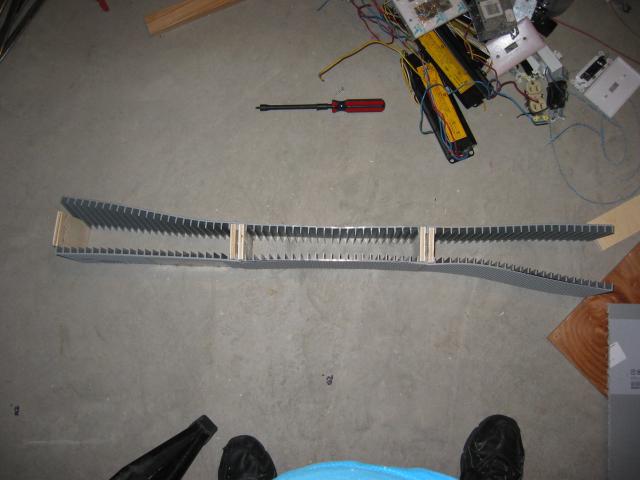
In this diagram, you can see the first row of the module storage unit being assembled. I used #8 1" wood-screws to hold the individual supports together. By tightening the screws, it also ended up holding the ribs of the ends together.
Note that cutting an 8' x 4' sheet of plywood into 6" strips is going to result in 7 strips of 6" and 1 strip of around 5" (because it's not exactly 48" wide to begin with, and there's lossage when cutting). Therefore, I've used the thinner piece as the spacer. In the current design, the spacers are shortened anyway to be the depth of the 1/4 INREDA (4 7/8"), rather than 6". The thickness of plywood I'm using (5/8") tends to be warped. Face the plywood so that the warp is bulging up — gravity will fix it. Finally, the two screws that hold the facing pieces of supports should be screwed in so that you can do it from the "outside" edge rather than the inside edge.
First Row Prototype
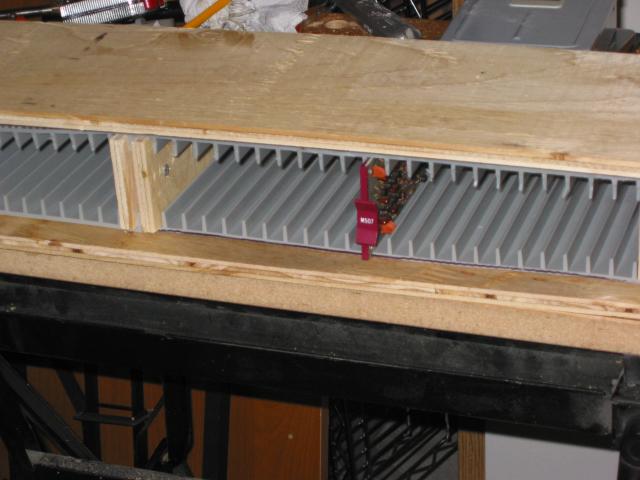
This is what the first row of the project looks like. I'm going to increase the height of the supports by 1/4" because the boards are a slightly tight fit, and I have the room. Currently, I'm a little worried that the ribs might sag in the middle, because there's nothing holding them up. However, I figure that when the modules are in the storage shelves, they'll hold up the middles quite nicely. For shelves that aren't populated, I can simply add some supports — they're very small and inexpensive pieces of wood.
You might think of screwing the INREDA to the wood — that doesn't work so well. The bottom of the INREDA is full of tiny little plastic domes, kind of like LEGO, and when you tighten that against the wood it tends to cause the ribs on the other side of the screw to widen apart, causing a deformity. My current thinking is to use Contact Cement, and see what happens.
2008 11 10 — Contact Cement
The answer to "see what happens" when you use contact cement is ... "Kids, don't try this at home." It was an unmitigated disaster. The INREDA shrivelled and is now permanently warped, and there is a nice sticky mess on the wood. The contact cement bonded just fine to the wood, but only screwed up the INREDA.
So, I guess we'll just have to stick with screws and luck. (Luckily I had tried this on only one piece of INREDA and one section of wood. I'll probably be able to sand off the sticky mess and reuse the wood.)
2009 01 01 — First Set Complete
I've managed to complete the first set of shelves over the Christmas/New Years Holiday break.
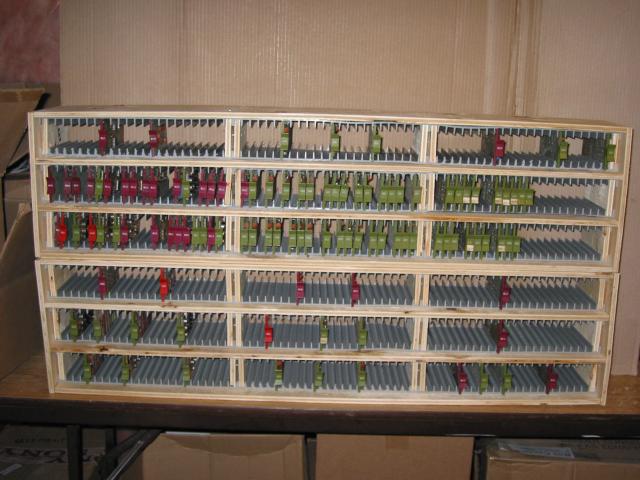
Followed fairly quickly (2009 01 02) by the second set.
Note that the powerpoint in the previous page implies that each "unit" would be six high, not three high. I found the three high to weigh enough (just the wood, let alone populated with modules) that I'm going to simply build them in "three high" units.
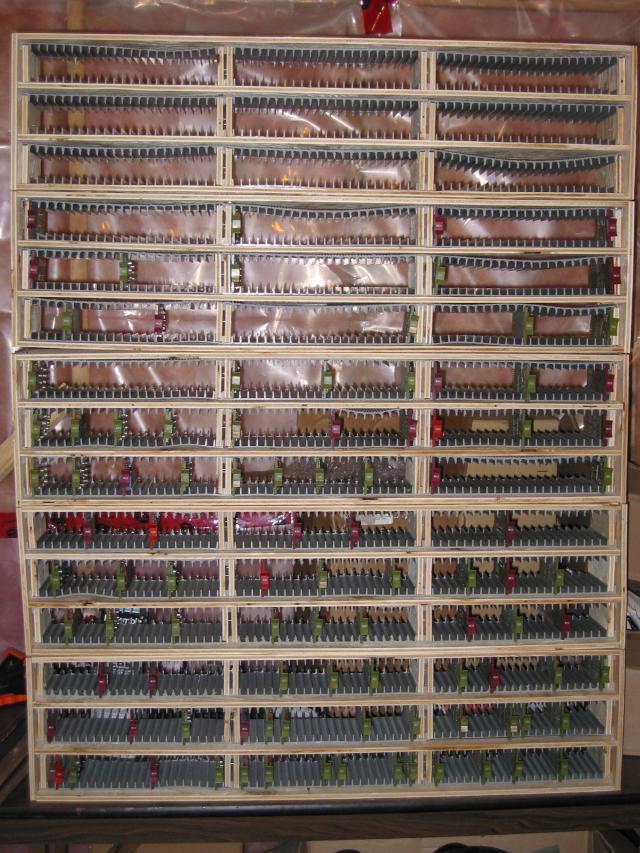
And the third set (2009 01 04). Once you get into the swing of it, and have done work on a "production line" basis, everything snaps together pretty quickly. This is 5 3-high modules, which represents 5/8ths of the complete single-high storage shelves. Some of the holders show definite "sagging." This is fine, because once you populate it with modules, the sagging disappears. As of this evening, I'm up to 6 units; my cordless screwdriver needs to be recharged, which is a sign to go have beer.
2009 01 11 — Completed
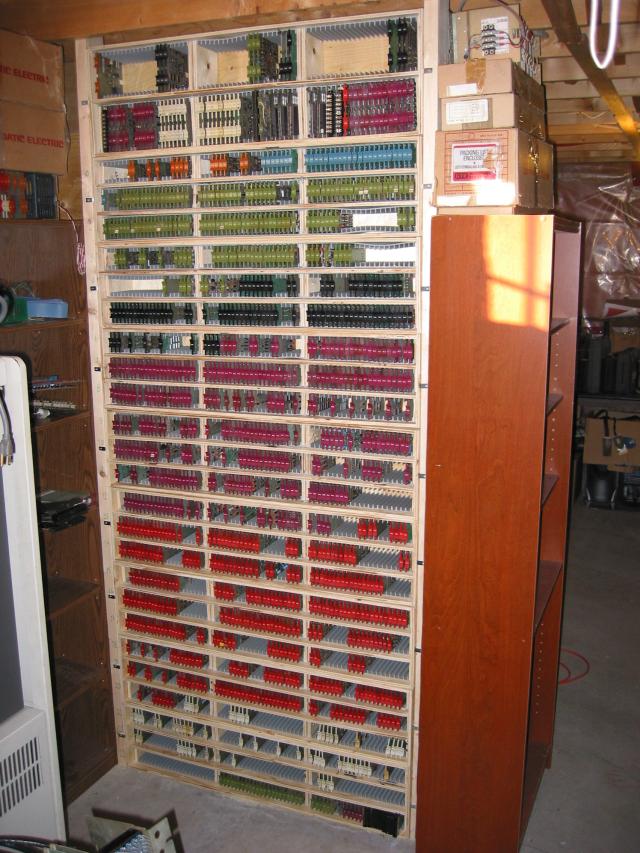
Finally!
If I had to take a guess at home much time it took, I'd say about 4-5 days total. Money-wise, the project was completely within the budget (which is not that surprising — the most expensive part was the IKEA INREDAs and they were easy to compute exactly how many would be required. Also, the project got scaled back a tiny bit; originally I was going to make 10 double-height holders (5 x 2 doubles) and 6 quad-height holders (3 x 2 quads), but due to space restrictions only ended up making 6 doubles and 4 quads).
The arrangement of the modules is alphabetic; I wrote a little program that took my inventory list and computed the location of each module, so that I could simply pick modules at random and place them in the right spot. I tried to leave 3 spaces after each module type in the single-height modules, for future expansion. The reason this doesn't look like the description is because my inventory list was obviously not 100% accurate. That's the problem with having modules spread out over dozens of boxes!
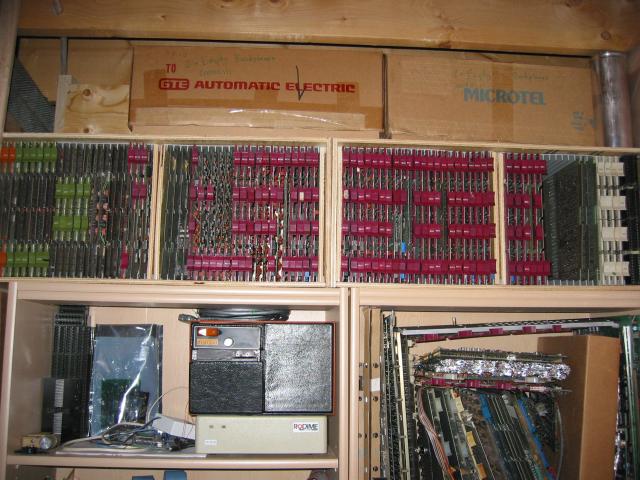
This picture shows the quad high module storage racks.